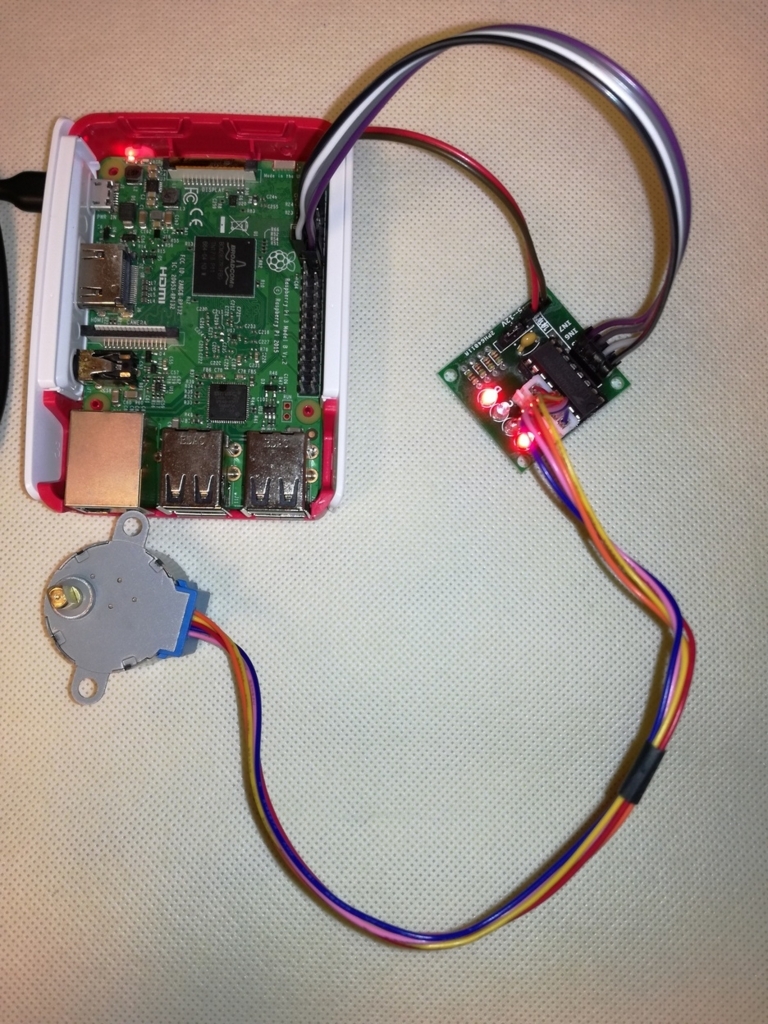
とっても安くて扱いやすいステッピングモーターをゲット♪
前回の記事ではステッピングモーターをarduinoで動作させてみました。
www.blue-weblog.com
これRaspberryPiでも動作するよね?
とういうわけで今回はラズパイで動作させてみます。
以下のサイトを参考にさせていただきました。
tutorials-raspberrypi.com
ラズパイにもGPIOはもちろん、5Vの出力があるため、別途電源を用意せずともこのステッピングモーターを動作させられます。
ラズパイのGPIOは以下です。

ピンの配線ですが、ドライバボードの1、2、3、4ピンをそれぞれラズパイのGPIO17、22、23、24に接続します。
あとは電源の5VとGroundを接続すれば完成♪
Pythonのプログラムは以下です
import RPi.GPIO as GPIO
import time

GPIO.setmode(GPIO.BCM)
GPIO.setwarnings(False)
coil_A_1_pin = 17 # pink
coil_A_2_pin = 22 # orange
coil_B_1_pin = 23 # blue
coil_B_2_pin = 24 # yellow

# adjust if different
StepCount = 8
Seq = [[1,0,0,1],
 [1,0,0,0],
 [1,1,0,0],
 [0,1,0,0],
 [0,1,1,0],
 [0,0,1,0],
 [0,0,1,1],
 [0,0,0,1]]

#GPIO.setup(enable_pin, GPIO.OUT)
GPIO.setup(coil_A_1_pin, GPIO.OUT)
GPIO.setup(coil_A_2_pin, GPIO.OUT)
GPIO.setup(coil_B_1_pin, GPIO.OUT)
GPIO.setup(coil_B_2_pin, GPIO.OUT)

#GPIO.output(enable_pin, 1)

def setStep(w1, w2, w3, w4):
    GPIO.output(coil_A_1_pin, w1)
    GPIO.output(coil_A_2_pin, w2)
    GPIO.output(coil_B_1_pin, w3)
    GPIO.output(coil_B_2_pin, w4)

def forward(delay, steps):
    for i in range(steps):
        for j in range(StepCount):
            setStep(Seq[j][0], Seq[j][1], Seq[j][2], Seq[j][3])
            time.sleep(delay)

def backwards(delay, steps):
    for i in range(steps):
        for j in reversed(range(StepCount)):
            setStep(Seq[j][0], Seq[j][1], Seq[j][2], Seq[j][3])
            time.sleep(delay)

if __name__ == '__main__':
    while True:
        delay = raw_input("Time Delay (ms)?")
        steps = raw_input("How many steps forward? ")
        forward(int(delay) / 1000.0, int(steps))
        steps = raw_input("How many steps backwards? ")
        backwards(int(delay) / 1000.0, int(steps))
※上記サイトのサンプルに少し手を加えています
たったこれだけでちゃんと動作しました♪

本当に便利なモーターです♪